



Laptop Fan Replacement Cost Guide
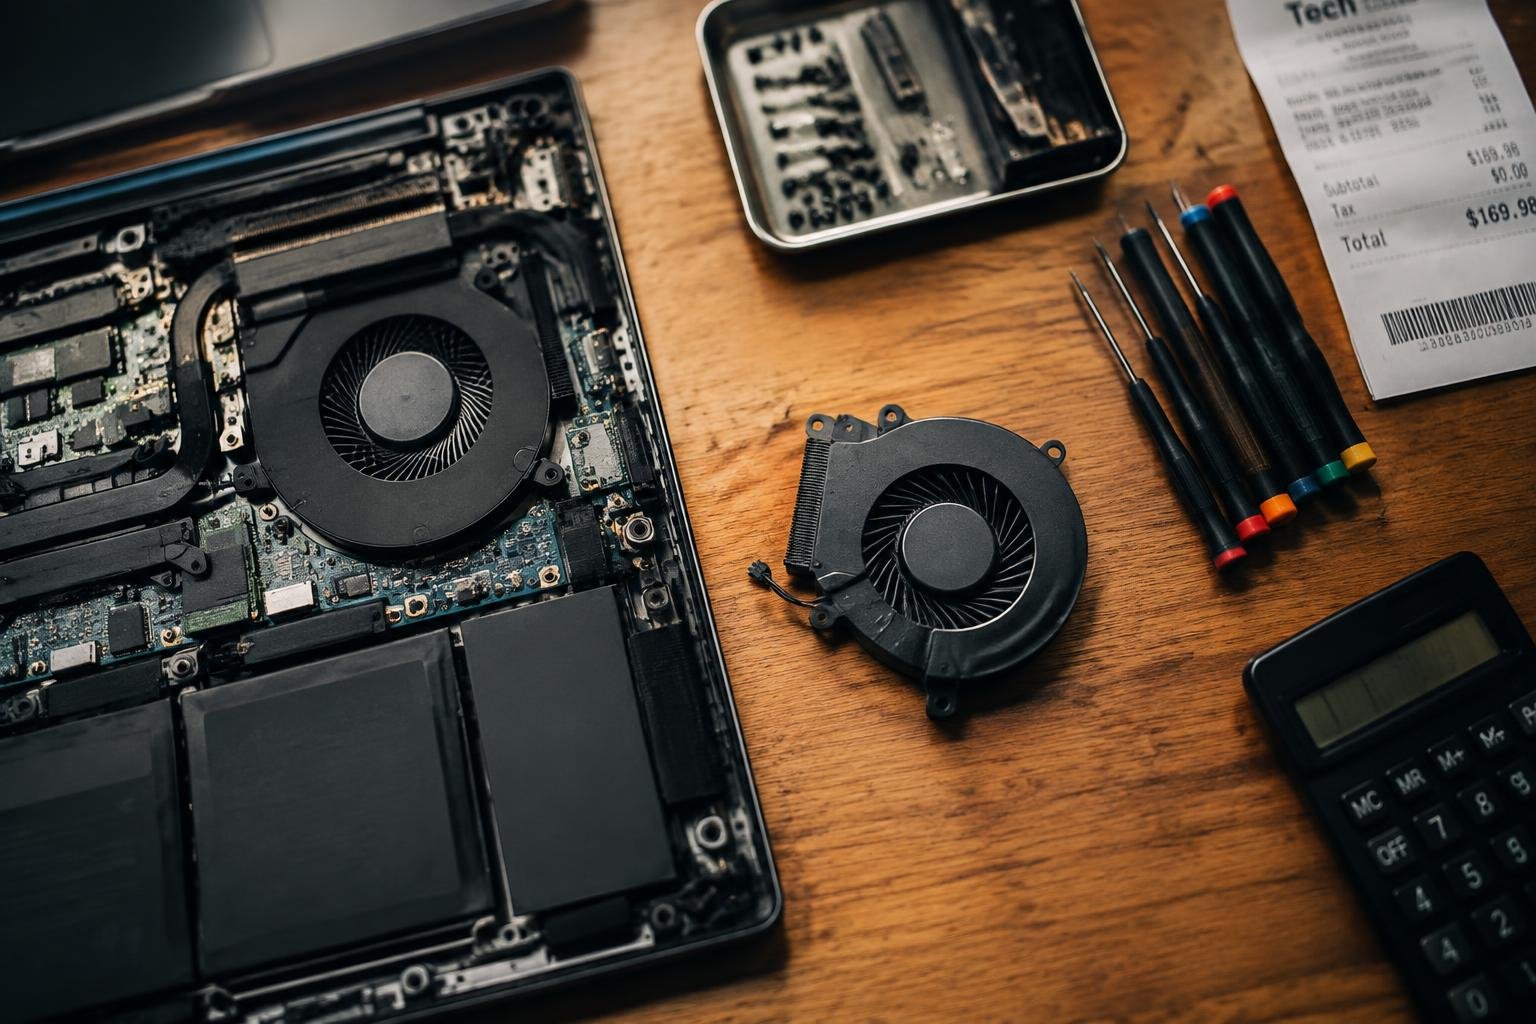
You’re likely reading this because your laptop is overheating, making strange noises, or shutting down unexpectedly. A failing fan is a common culprit, and replacing it can restore performance and prevent damage. This guide breaks down what you’ll pay, what affects pricing, and whether to do it yourself or hire a technician.
Key Takeaways:
- Laptop fan replacement costs typically range from $50 to $150, with prices varying based on device model, labor rates, and whether the service is performed at a repair shop or done at home.
- High-performance laptops, such as gaming or workstation models, often require more expensive cooling components due to complex thermal designs and proprietary parts.
- DIY replacements can cut costs significantly, with fan units available online for $15 to $40, but require technical confidence and proper tools to avoid damaging internal components.
- Some ultrabooks and compact laptops integrate the fan into the motherboard or use glued heat pipes, making replacement difficult and increasing labor time and cost.
- Regular cleaning and thermal paste replacement during fan service can improve cooling efficiency and extend the lifespan of the repair, potentially avoiding repeat visits to a technician.
Primary Factors Influencing Repair Pricing
The final cost of replacing your laptop fan isn’t fixed-it shifts based on several key elements. Your laptop’s brand and model play a major role, as some manufacturers use proprietary designs or source parts globally in limited quantities. Availability affects pricing directly: rare or discontinued models often require sourcing from specialty suppliers. Labor rates vary by region, but the complexity tied to accessing internal components due to build quality or compact chassis design also impacts total pricing. You’ll pay more when parts are harder to find or built into tightly integrated systems.
- Premium brands like Apple or Razer often have higher part costs
- Discontinued models may require used or aftermarket fans
- Proprietary cooling systems limit replacement compatibility
- Global supply chain delays can increase part prices temporarily
- Compact ultrabooks typically cost more to repair than standard models
Laptop Brand and Model Rarity
Your laptop’s make and specific model greatly influence replacement expenses. Brands such as Lenovo, Dell, and HP generally offer broader part availability due to high production volumes, keeping prices lower. In contrast, niche or high-performance models from ASUS ROG or MSI may use custom cooling assemblies that are harder to source. Older or discontinued units often rely on secondhand markets, where prices fluctuate. You might face extended wait times or compromise on using non-OEM alternatives when original parts are no longer manufactured.
Geographic Location and Labor Rates
Where you live directly impacts what you’ll pay for service, even if the fan part itself has a standard price. Urban areas with higher living costs typically see elevated labor charges at repair shops. A mid-sized SaaS firm’s IT department in New York, for example, may report double the hourly rate compared to a technician in a rural Midwest town. International users should consider import duties and local distributor markups when ordering genuine components. You’re likely to see noticeable differences in total cost just by comparing quotes across regions.
Laptop Fan Types and Component Costs
Different laptops require distinct cooling solutions, and your replacement cost hinges largely on the type of fan your system uses. Standard fans in everyday ultrabooks and business laptops rely on simple, energy-efficient designs, keeping production costs low. Gaming and workstation models demand more robust airflow, using multi-heat-pipe configurations and higher-RPM fans that inherently cost more to produce and replace. Below is a breakdown of common fan types and their typical price ranges.
- Standard cooling fan (ultrabooks, office laptops)
- High-RPM dual-fan module (gaming laptops)
- Blower-style thermal unit (older workstations)
- Copper heat pipe + fan combo (premium thin laptops)
- Third-party universal replacement kit
| Component Type | Average Cost Range |
| Standard Cooling Fan | $15 – $30 |
| Gaming Laptop Fan Module | $40 – $80 |
| OEM Heat Sink + Fan Assembly | $50 – $120 |
| Third-Party Fan Unit | $20 – $50 |
| Universal Replacement Kit | $25 – $60 |
Standard vs. Gaming Cooling Units
Standard cooling units found in most consumer laptops use smaller motors and simpler blade designs suited for moderate workloads. These fans rarely exceed 5,000 RPM and are built for quiet operation and energy efficiency. In contrast, gaming laptop fans spin faster, often surpassing 7,000 RPM, and may include dual-fan setups or larger copper heat pipes. The materials and engineering behind these high-performance units drive replacement costs significantly higher than their standard counterparts.
OEM vs. Third-Party Replacement Parts
You’ll face a clear choice between OEM and third-party fans when sourcing a replacement. OEM parts are manufactured specifically for your laptop model, ensuring perfect fit and compatibility but often at a premium price. Third-party alternatives offer cost savings and broader availability, though quality can vary between brands. Some perform nearly as well as OEM units, while others may compromise longevity or noise levels. Your decision impacts both upfront cost and long-term reliability.
Pros and Cons of Professional vs. DIY Repair
Hiring a certified technician means you receive service backed by warranty protection, reducing stress if something goes wrong after the fix. You’re paying for trained hands and proper diagnostic tools, which minimizes the risk of accidental damage. On the other hand, choosing to replace the fan yourself cuts labor costs significantly, especially if you already own basic tools. While savings are appealing, lack of experience can lead to improper installation or static discharge risks that compromise internal components.
| Aspect | Professional Repair | DIY Repair |
| Labor Cost | Included in service fee | $0 – you do the work |
| Warranty | Typically 30-90 days | None unless part is new |
| Time Investment | Minimal on your part | Several hours learning and doing |
| Skill Requirement | Handled by expert | Moderate to high |
| Tools Needed | Provided by technician | You must acquire them |
| Risk of Damage | Very low | Moderate to high |
| Part Quality Control | Verified by provider | Depends on your source |
| Downtime | May require shipping or wait time | Immediate start, variable finish |
| Diagnostic Accuracy | High with professional tools | Relies on your research |
| Total Cost Range | $80-$150 | $20-$50 (parts only) |
Benefits of Certified Service Centers
Certified service centers employ technicians trained specifically for your laptop brand, ensuring compatibility and adherence to manufacturer standards. You benefit from correct thermal paste application, precise fan alignment, and genuine replacement parts that maintain system integrity. Most importantly, repairs come with a warranty, giving you recourse if the fan fails shortly after service. This level of accountability is difficult to match outside authorized networks, especially for premium devices like MacBooks or business-class ThinkPads.
Risks and Savings of Self-Repair
Replacing the fan yourself can save up to $100 in labor, making it an attractive option for budget-conscious users. You control the pace, choose the replacement part, and gain firsthand knowledge of your device’s internals. However, one misstep-like stripping a screw or disconnecting the wrong ribbon cable-can result in costly collateral damage. Without a warranty, any mistake becomes your responsibility, potentially turning a simple fix into an expensive lesson.
Step-by-Step Replacement Procedure
A successful fan replacement hinges on careful execution and attention to thermal management during reassembly. Systematic disassembly prevents damage to delicate connectors, while proper application of thermal paste ensures efficient heat transfer between the CPU and heatsink. Rushing this process can lead to overheating issues or hardware failure, so take your time and work in a clean, well-lit space with all necessary tools within reach.
| Necessary Tools | Phillips screwdrivers (sizes #0 and #1), plastic pry tool, tweezers, anti-static wrist strap |
| Preparation Steps | Power off laptop, disconnect battery, ground yourself, organize screws by location |
| Thermal Paste Application | Use pea-sized amount centered on CPU; avoid spreading manually unless specified |
Necessary Tools and Preparation
You’ll need a set of precision screwdrivers that match your laptop’s screw types, typically Phillips #0 and #1. Include a plastic opening tool to safely release clips without scratching the casing. Work on a clean, static-free surface and use an anti-static wrist strap to protect internal components. Before opening the chassis, power down the system completely, unplug the charger, and remove the main battery if accessible. Label and sort screws as you go to simplify reassembly.
Removal and Installation Process
Begin by removing the bottom panel and locating the fan assembly near the processor or GPU. Disconnect the fan’s power cable from the motherboard before unscrewing the unit. Carefully lift the old fan, noting its orientation and any attached heat pipes. Position the new fan identically, reconnect the cable, and secure it with screws. Reapply thermal paste only if the heatsink was fully detached, ensuring full contact before closing the chassis.
Maintenance Tips for Longevity
Keeping your laptop’s cooling system in top condition helps avoid unexpected fan failures and costly repairs. Dust buildup and restricted airflow are leading causes of overheating, which forces the fan to work harder and wear out faster. You can significantly extend your fan’s lifespan by adopting simple, consistent habits that support efficient operation. Focus on cleanliness and proper ventilation to maintain peak performance over time.
- Power down and unplug your laptop before any maintenance
- Use compressed air to remove dust from vents and fan housing
- Avoid using your laptop on soft surfaces like beds or couches
- Elevate the device slightly to improve air intake from below
- Monitor internal temperatures using free system tools
Cleaning Schedules and Techniques
How often you clean your laptop depends on your environment, but a monthly check is wise for most users. If you notice louder fan noise or unexpected shutdowns, inspect the vents immediately. Use short bursts of compressed air to dislodge dust from intake and exhaust ports. For deeper cleaning, carefully open the access panel if your model allows it, and gently blow out accumulated debris around the fan blades. Always ground yourself to prevent static damage.
Optimized Airflow and Cooling Pads
Your laptop performs best when heat can escape freely. Placing it on a hard, flat surface allows air to circulate through the bottom intake vents. Consider using a cooling pad with quiet, effective fans that draw heat away without adding bulk. These pads work especially well during long work sessions or intensive tasks like video editing. Position the laptop so exhaust vents aren’t blocked, and keep the surrounding area clutter-free to maintain consistent airflow.
To wrap up
You now have a clear understanding of what influences laptop fan replacement costs and how to make an informed decision. Whether you choose professional service or a DIY approach, your choice impacts both immediate expenses and long-term reliability. Factoring in labor rates, part quality, and device compatibility helps avoid unnecessary spending. Regular maintenance reduces the likelihood of repeat issues, preserving performance. You’re equipped with the knowledge to act confidently when cooling problems arise.
FAQ
How much does it cost to replace a laptop fan?
The cost to replace a laptop fan typically ranges from $80 to $200, including parts and labor. This depends on the laptop brand, whether the part is OEM or third-party, and local labor rates, with premium models and gaming laptops often at the higher end.
How long does it take to replace a laptop fan?
Replacing a laptop fan usually takes 1 to 2 hours for a technician, depending on the model and complexity. Some laptops have hard-to-access fans requiring extensive disassembly, which can extend the repair time significantly.
Is it worth replacing a laptop fan instead of buying a new laptop?
Yes, replacing a laptop fan is often worth it if the rest of the system is functioning well and less than three years old. The repair can extend the laptop’s life by several years, especially when overheating is the only issue.
What are common mistakes when replacing a laptop fan yourself?
Common mistakes include misplacing screws, damaging connectors during disassembly, and applying too much or too little thermal paste. These errors can lead to poor cooling performance or even hardware damage, especially on tightly integrated models.
Can a dirty fan be cleaned instead of replaced?
Yes, a dirty fan can often be cleaned instead of replaced, especially if the issue is dust buildup causing noise or mild overheating. However, if the fan bearings are worn or the motor is failing, cleaning won’t help and replacement is necessary.
 Previous Post
 Next Post