



Laptop Display Cable Replacement Cost Guide
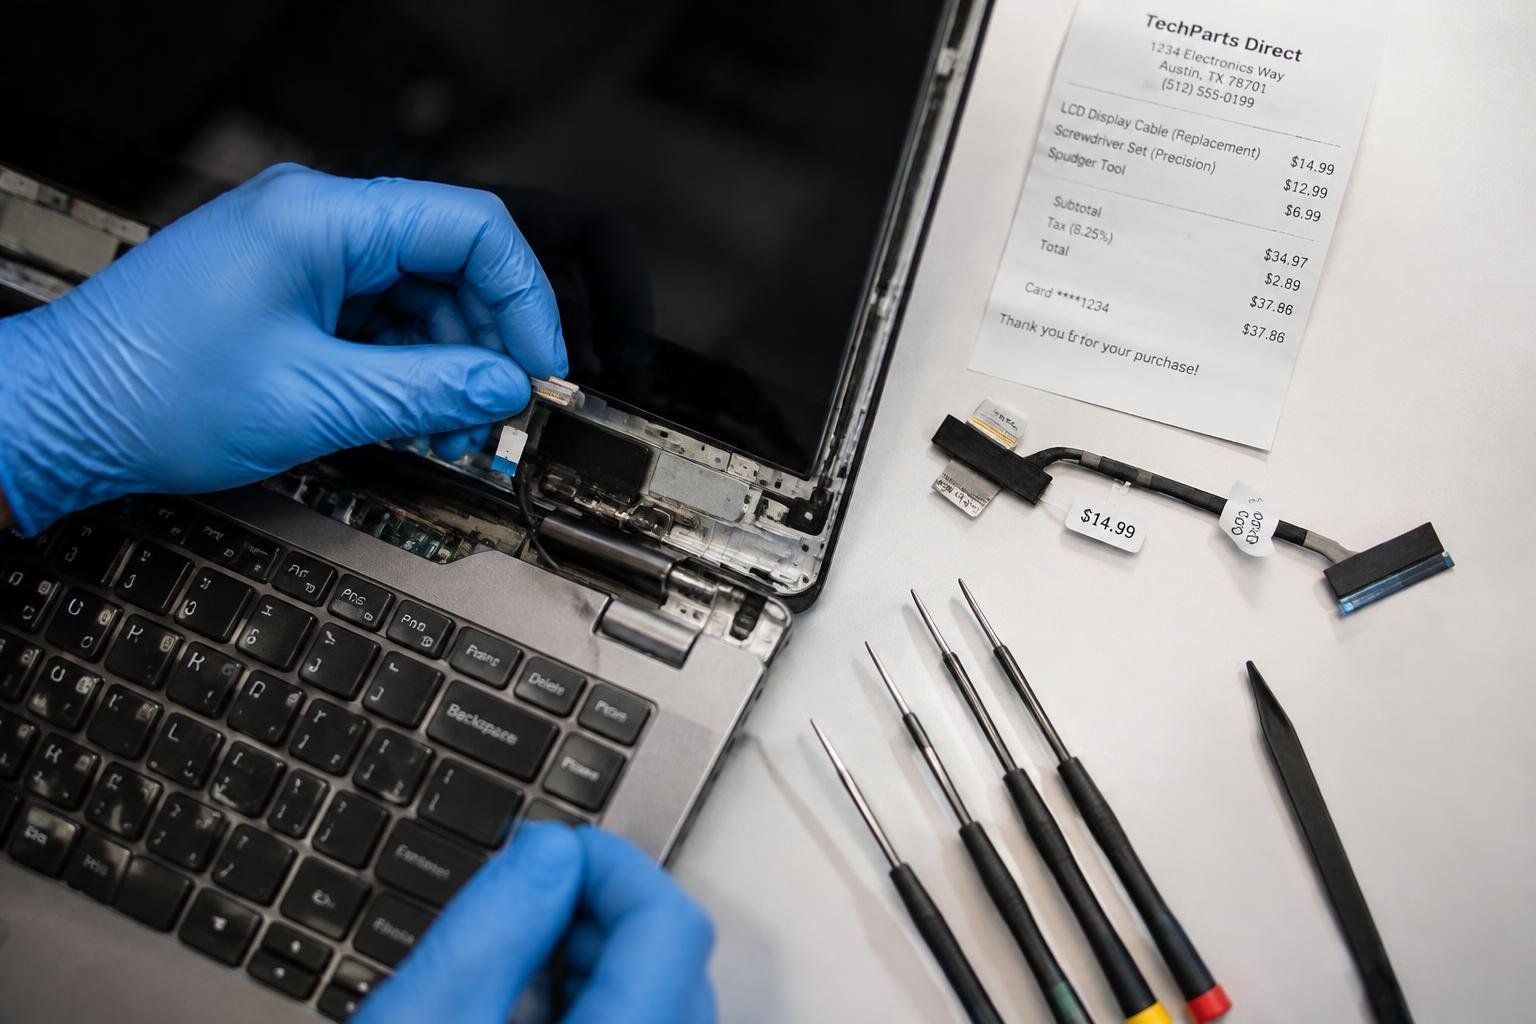
You’re likely reading this because your laptop screen flickers, shows no image, or only works at certain angles-common signs of a failing display cable. Replacing this component can restore full functionality, but costs vary widely based on laptop model, cable type, and whether you DIY or hire a technician. This guide breaks down what you’ll pay and why, so you can make a smart, informed decision.
Key Takeaways:
- Laptop display cable replacement costs typically range between $50 and $200, depending on the laptop brand, model, and labor rates at repair shops.
- Some laptops use proprietary cables that are more expensive and harder to source, such as certain models from Apple, Dell, and Lenovo.
- DIY repairs can reduce costs significantly, but require technical skill and proper tools to avoid damaging sensitive internal components.
- Integrated designs in modern ultrabooks often make cable replacement more complex and costly due to the need to disassemble multiple parts of the device.
- Warranty status and repair history can affect whether a replacement is covered or eligible for discounted service through the manufacturer or third-party providers.
Common Types of Laptop Display Cables
Determining the correct display cable type in your laptop ensures compatibility and prevents unnecessary expenses during replacement. Most modern devices use either LVDS (Low-Voltage Differential Signaling) or eDP (embedded DisplayPort) interfaces, each differing in bandwidth, pin configuration, and power efficiency. Some manufacturers also implement proprietary variants that are not interchangeable across models. Identifying your system’s specific cable type is essential before sourcing a replacement.
- Liquid Crystal Display (LCD) laptops commonly use LVDS cables
- Thin and lightweight models typically integrate eDP connections
- eDP supports higher resolutions and refresh rates than LVDS
- Proprietary cables may combine unique connectors with non-standard routing
- Cable identification often requires checking service manuals or original part numbers
| Cable Type | Key Characteristics |
|---|---|
| LVDS | Analog signaling, typically 30- or 40-pin, used in older or budget laptops |
| eDP | Digital interface, lower power consumption, common in modern ultrabooks |
| Proprietary LVDS | Manufacturer-specific pin layout or connector shape, limited compatibility |
| Proprietary eDP | Custom shielding or flex design, often found in premium branded laptops |
| FPC (Flexible Printed Circuit) | Integrated into some compact designs, serves as both cable and mounting element |
LVDS vs. eDP Connections
Your laptop’s display performance hinges on whether it uses LVDS or eDP technology. LVDS cables transmit analog signals and are usually found in older or entry-level systems, supporting up to 1080p resolution at modest refresh rates. eDP cables, in contrast, deliver digital signals with greater efficiency, enabling sharper displays and thinner bezels. You can distinguish them by checking the number of pins-eDP often uses fewer-and confirming compatibility through your device’s technical documentation.
Model-Specific Proprietary Cables
You may encounter cables designed exclusively for a single laptop model or brand, especially with OEMs like Dell, HP, or Lenovo. These proprietary versions often feature custom locking mechanisms, unique bend tolerances, or integrated webcams and microphones within the cable assembly. Swapping them with standard replacements can lead to connection failures or physical damage. Always verify your exact model number and consult official schematics to confirm the correct cable variant before purchasing.
Primary Factors Influencing Replacement Costs
The total cost of replacing a laptop display cable hinges largely on two elements: the availability of the component and where you live. Popular brands with strong supply chains tend to offer affordable parts, while rare or discontinued models can drive prices up due to scarcity. Labor rates also vary significantly by region, with urban centers typically charging more for technician time. You’ll pay more for a repair on a niche ultrabook than on a mainstream notebook, not just because of the part itself but also due to extended service times.
- Brand rarity affects part pricing and sourcing difficulty
- Premium manufacturers often charge more for identical components
- Local technician demand influences hourly labor fees
- Remote or rural areas may have limited repair options
- High-cost cities reflect elevated service pricing
Component Availability and Brand Premium
You’ll notice price differences based on how easily the display cable can be sourced. Major brands like Dell or Lenovo maintain broad inventories, keeping replacement costs lower. In contrast, cables for boutique or older models-such as certain ThinkPad X series variants or premium Sony VAIO units-often require specialty suppliers, increasing the part’s price. Some manufacturers also impose a brand premium, meaning even functionally similar cables cost more when sold under their label. This markup reflects perceived reliability and warranty support.
Labor Rates and Geographic Location
Your location directly impacts what you’ll pay for skilled labor during the repair. A technician in San Francisco or New York typically charges more per hour than one in a smaller Midwest town due to higher living expenses. Service shops in densely populated areas may also have longer waitlists, indirectly affecting pricing through demand. Even if the cable itself is inexpensive, labor can double the final bill depending on your zip code. Always check local shop rates before committing to a repair.
Step-by-Step Cable Replacement Procedure
Following a structured disassembly path ensures that fragile connectors, ribbon cables, and internal brackets aren’t damaged during repair. Each laptop model follows a specific sequence for removing panels, screws, and components to safely reach the display assembly. Deviating from this order increases the risk of breaking plastic clips or scratching circuitry. Working methodically also makes reassembly smoother, reducing the chance of leftover parts or misalignments.
| Procedure Stage | Action Required |
|---|---|
| Disassembly Path | Follow manufacturer-specific screw maps and panel removal sequences |
| Cable Handling | Disconnect with gentle pressure using a spudger or fingernail |
| Reassembly Check | Verify all connections before powering on the device |
Tool Preparation and Safety Protocols
You need precision tools like a P2 Pentalobe screwdriver, plastic pry tools, and an anti-static wrist strap to prevent electrostatic discharge. Work on a clean, well-lit surface free of clutter and ensure the laptop is powered off and unplugged. Remove the battery if possible to eliminate electrical risks. Organize screws on a labeled mat to avoid mix-ups during reassembly. Keeping your workspace controlled reduces the chance of damaging sensitive parts.
Accessing the Motherboard and Screen
Your first step is removing the back cover by unscrewing all visible fasteners and carefully separating the casing with a plastic opener. Once open, trace the display cable from the motherboard to the hinge area, noting its routing under or through other components. Disconnect it gently from the GPU or display port, taking care not to yank it. Some models require removing the bezel or speaker assembly to fully access the screen’s connection points.
Professional Repair vs. DIY: Pros and Cons
Choosing between professional repair and DIY replacement hinges on balancing warranty protection with potential cost savings. Opting for certified service preserves manufacturer warranties and ensures accurate diagnostics, while self-repair offers immediate savings but risks long-term expenses if done incorrectly. Your decision should reflect your technical confidence and the value you place on guaranteed results. Below is a breakdown of key considerations.
| Aspect | Professional vs. DIY Comparison |
|---|---|
| Cost | Professional repair typically costs more due to labor and service fees; DIY saves on labor but requires tool and part investment. |
| Warranty Impact | Authorized repairs maintain or extend warranty coverage; DIY attempts often void existing warranties. |
| Time Investment | Professionals complete repairs efficiently; DIY may take longer due to inexperience or incorrect disassembly. |
| Accuracy | Certified technicians follow strict protocols; self-repair risks misdiagnosis or improper cable installation. |
| Part Quality | Professionals use OEM or certified parts; DIYers may unknowingly purchase low-quality or incompatible components. |
| Tool Requirements | Technicians have specialized tools; DIYers may need to buy or improvise, increasing hidden costs. |
| Convenience | Professional service offers drop-off and pickup options; DIY requires personal time and workspace setup. |
| Error Risk | Low with trained experts; high for inexperienced users, potentially leading to further damage. |
| Learning Curve | None for customers; DIY demands research, patience, and technical understanding. |
| Long-Term Reliability | Professionally repaired units often last longer; DIY fixes may fail prematurely without proper execution. |
Benefits of Certified Technician Services
You gain peace of mind when certified technicians handle your laptop’s display cable replacement. These professionals follow manufacturer standards, use genuine parts, and perform diagnostics to rule out related issues. Your warranty remains intact, and most service centers offer post-repair support. For complex models or newer ultrabooks with glued components, their expertise reduces the chance of costly mistakes. You also avoid the time and frustration of troubleshooting errors that stem from improper installation.
Risks and Savings of Self-Repair
You can save significantly by replacing the display cable yourself, especially if you already own basic tools and have access to reliable guides. Entry-level repairs on older models may take under an hour and cost under $20 in parts. However, you risk damaging connectors, the display, or internal components if you’re not careful. Without proper experience, a simple fix can turn into a more expensive problem. Your warranty will no longer cover the affected components, leaving you responsible for future costs.
Expert Tips for a Long-Lasting Repair
Proper cable management plays a major role in preventing mechanical stress after reassembly. When you route cables incorrectly or force them into tight spaces, tension builds over time, increasing the risk of fraying or disconnection. Avoid sharp bends and ensure cables lie in their designated channels without compression from other components. Secure loose ends with manufacturer-recommended clips or adhesive mounts to maintain position. Good organization not only protects the display cable but also improves airflow and serviceability for future maintenance.
- Follow the original cable path exactly as designed by the manufacturer
- Use only approved fasteners or adhesive mounts to secure cables
- Avoid placing pressure on the cable when closing the lid or hinge
- Ensure no part of the cable rubs against moving or sharp-edged components
- Double-check alignment before securing any panels or brackets
Cable Routing and Hinge Alignment
Correct cable routing ensures smooth movement every time you open or close the laptop lid. You must guide the cable through the hinge channel without twisting or pinching it against metal edges. Misalignment forces the cable to stretch with each motion, accelerating wear at the weakest points. Match the factory’s loop pattern precisely and verify the cable glides freely when the display moves. A well-aligned path reduces friction and prevents premature failure caused by repeated bending.
Testing Display Signal Integrity
Once the cable is secured, power on the laptop and observe the screen for any flickering, discoloration, or signal drops. You might need to open and close the lid multiple times to check for intermittent issues under real hinge movement. Look for consistent image quality across all angles and brightness levels. If the display stutters or blacks out during motion, the cable may be improperly seated or under strain. Resolving signal flaws now prevents future breakdowns and confirms a reliable repair.
Summing up
You now have a clear understanding of what influences laptop display cable replacement costs, from the type of cable to labor fees and device models. Whether you choose professional service or a DIY fix, your decision impacts both immediate expenses and long-term reliability. High-end laptops often require more specialized parts, increasing the overall price. Your ability to source quality components and follow safety protocols makes a noticeable difference. For most users, professional repair offers peace of mind, while experienced individuals may save money through careful self-repair.
FAQ
How much does it cost to replace a laptop display cable?
Replacement costs typically range from $50 to $200, including parts and labor. The final price depends on the laptop brand, model-specific cable availability, and local repair shop rates, with premium or older models often on the higher end.
How long does it take to replace a laptop display cable?
Most replacements take 1 to 2 hours for a skilled technician. The time can vary based on the laptop’s design complexity, with some ultrabooks or older models requiring extra care during disassembly.
What are the risks of replacing a laptop display cable myself?
DIY replacement risks damaging the screen, motherboard, or hinges if proper tools and techniques aren’t used. Inexperience with small connectors and static discharge can lead to permanent hardware failure, voiding any existing warranty.
What are common mistakes when replacing a display cable?
Common mistakes include misrouting the cable, over-tightening connectors, or damaging the hinge assembly during reassembly. Ensuring correct alignment and gentle handling prevents signal issues or premature wear after the repair.
Is it worth fixing a laptop display cable or should I buy a new laptop?
It is often worth repairing if the laptop is otherwise functional and less than 5 years old. For older or low-value models, the repair cost may approach or exceed the device’s resale value, making replacement more economical.
 Previous Post
 Next Post