



Laptop DC Jack Repair Guide
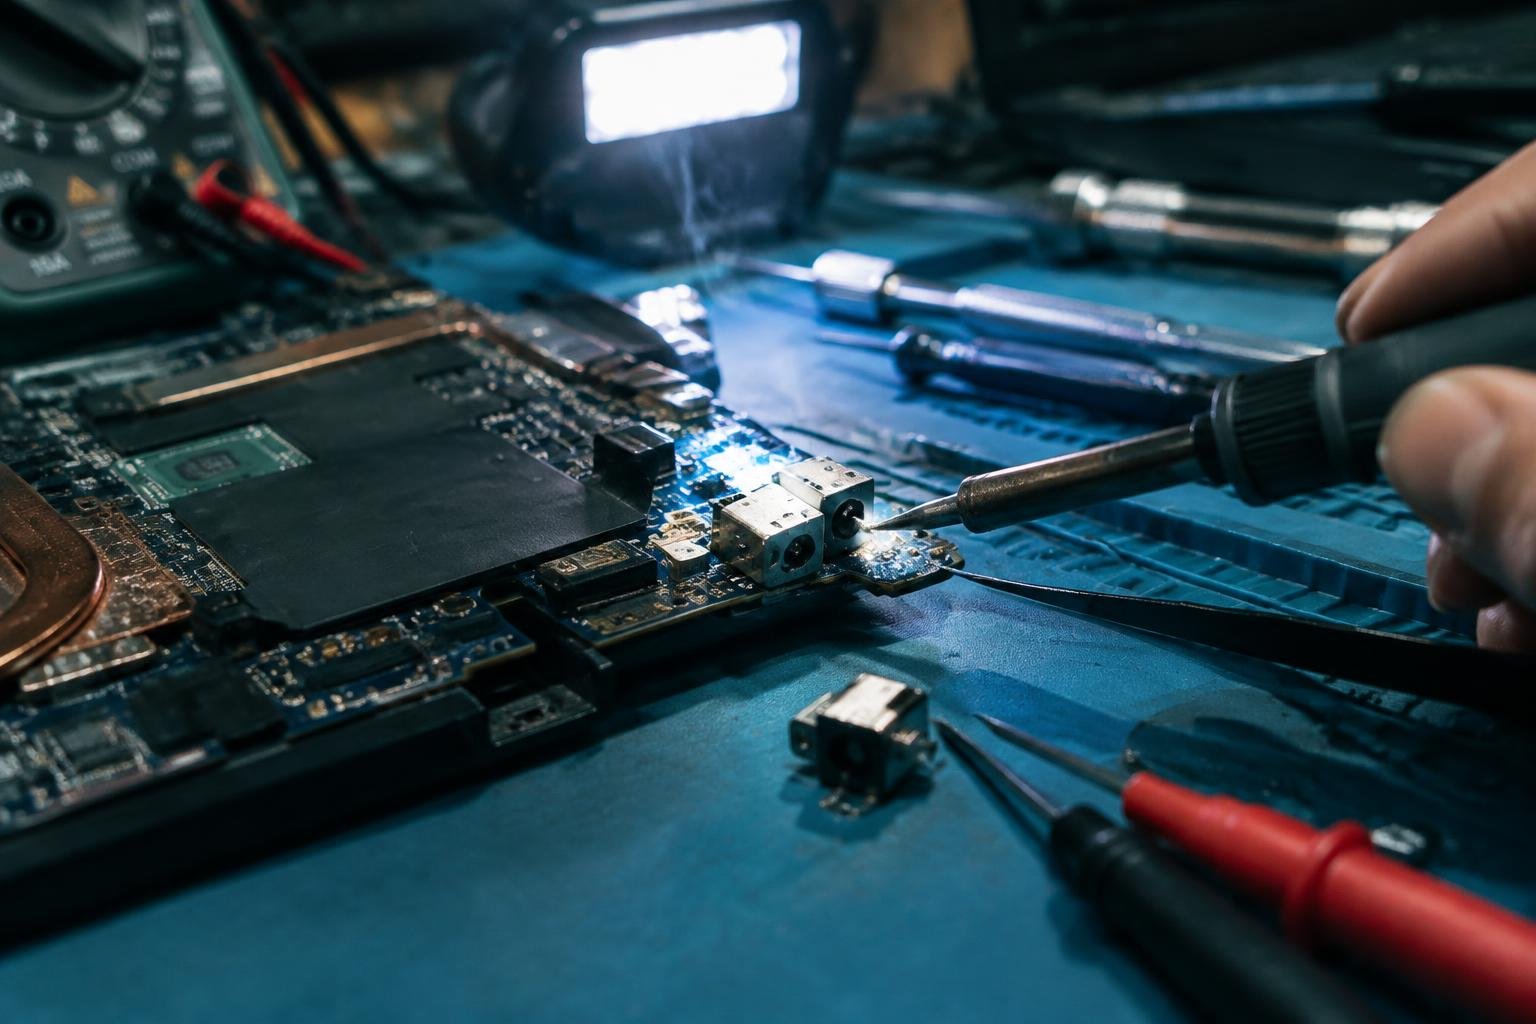
You’ve plugged in your laptop, but it won’t charge. The power cord wiggles, and the connection keeps dropping. Chances are, the DC jack is damaged. This guide walks you through diagnosing and repairing the issue yourself, step by step, using common tools and proven techniques to restore reliable charging without costly replacements.
Key Takeaways:
- The DC jack is responsible for connecting your laptop to its power supply, and damage often results in charging issues or complete power failure.
- Common signs of a faulty DC jack include intermittent charging, the need to hold the charger in a specific position, or visible wobbling at the port.
- Repairing a DC jack requires basic soldering skills and the right tools, including a soldering iron, desoldering pump, and a compatible replacement jack.
- Disassembling a laptop for DC jack repair varies by model-some require removing the motherboard, while others allow access without full disassembly.
- Testing the repair before reassembling the laptop helps confirm a solid connection and prevents repeated disassembly due to overlooked issues.
Identifying Laptop DC Jack Types
Recognizing the type of DC power jack in your laptop determines the repair approach and tools required. Two primary designs are commonly used: soldered motherboard jacks and modular plug-in harness jacks. Each type varies in accessibility, replacement method, and durability. Understanding these differences ensures accurate diagnosis and prevents unnecessary component damage during repair.
- Soldered jacks are directly attached to the motherboard
- Modular jacks connect via a detachable cable harness
- Design affects repair complexity and part availability
- Some models integrate the jack with the USB or audio board
- Physical inspection often reveals the type without disassembly
| Soldered Jacks | Permanently affixed to the motherboard with solder points |
| Modular Jacks | Attached via a short cable harness with plug-in connectors |
| Repair Method | Soldering required vs. plug-and-play replacement |
| Common Brands | Frequent in Dell, older HP, and Lenovo ThinkPads |
| Failure Indicators | Loose charging, intermittent power, visible wobbling |
Soldered Motherboard Jacks
You’ll find this type directly mounted onto the motherboard, secured by soldered leads passing through the board. These jacks are common in compact or high-end models where space and structural integrity are prioritized. Repair demands precision soldering skills, as the component must be desoldered and a new jack properly aligned and re-soldered. Damage to surrounding traces or pads can lead to permanent charging failure, so stability and accuracy are essential during replacement.
Modular Plug-in Harness Jacks
A separate cable assembly holds the DC jack and connects to the motherboard through a small plug, making this design easier to replace. These jacks are often housed in the laptop’s rear or side casing, attached to a circuit board or metal shield. When power delivery fails, you can swap the entire harness without touching the motherboard. This setup reduces repair risk and is common in mid-range consumer laptops from brands like Acer and Toshiba.
Essential Equipment and Safety Tips
Setting up a proper workspace ensures precision and safety during DC jack repairs. Choose a clean, well-lit area with ample room to organize tools and components. Keep the surface static-free by using an anti-static mat and wrist strap. Always power down the laptop completely and unplug it before beginning any work. Avoid wearing loose clothing or jewelry that could interfere with delicate soldering tasks. Maintain good ventilation when using a soldering iron to prevent inhalation of fumes.
- Soldering iron with fine tip (adjustable temperature preferred)
- Desoldering pump or desoldering braid
- Lead-free solder wire (0.8mm diameter recommended)
- Flush-cutting wire cutters
- Magnifying glass or illuminated magnifier stand
- Anti-static wrist strap and work mat
- Heat-resistant stand for the soldering iron
Required Soldering and Desoldering Tools
A reliable soldering iron with temperature control gives you consistent heat for precise connections without damaging surrounding circuitry. Use a fine tip to access tight spaces around the DC jack. Pair it with a quality desoldering pump or braided wick to cleanly remove old solder from motherboard pads. Fresh solder ensures strong joints when installing the replacement jack. Keep tools clean-oxidized tips lead to weak bonds and potential damage.
Electrostatic Discharge and Battery Safety
Your body can carry static charges high enough to fry sensitive motherboard components. Ground yourself with an anti-static wrist strap connected to a grounded surface before touching internal parts. Remove the laptop’s battery if possible, especially when working near power circuits. Never leave exposed terminals or connectors unattended. Work on non-conductive surfaces and keep liquids away from your setup to avoid accidental shorts or slips.
Step-by-Step Disassembly and Installation
Begin by powering down your laptop completely and disconnecting the charger to eliminate electrical hazards. Use the correct screwdriver to remove the screws securing the back panel, keeping them organized to avoid loss. Carefully pry open the chassis using a plastic spudger to prevent damaging plastic clips. Once the housing is off, locate the DC jack on the motherboard. Disconnect the battery connector first to isolate power sources. Remove any metal shields or brackets holding the jack in place.
| Action | Detail |
| Power Down | Shut off the laptop and unplug the charger. |
| Remove Screws | Use a precision screwdriver; group screws by location. |
| Open Chassis | Apply a plastic tool to avoid scratching or cracking. |
| Locate DC Jack | Found near the edge of the motherboard, often soldered. |
| Disconnect Battery | Unplug the battery ribbon to prevent short circuits. |
Removing External Housing and Components
Start by placing your laptop on a clean, static-free surface and flipping it over. Remove all visible screws from the base, including those under rubber feet if necessary. Gently separate the bottom cover using a plastic opening tool, working around the edges to release snap-fit clips. Set the cover aside safely. If the DC jack is mounted on a daughterboard or near other components, disconnect related connectors like the Wi-Fi antenna or speakers only if they block access. Keep each part labeled and in a designated area.
Extracting and Seating the New DC Jack
Once the motherboard is accessible, examine how the DC jack is secured-either by surface soldering or mounting screws. If soldered, use a soldering iron and desoldering pump to clear the pins from the board, applying even heat to avoid lifting pads. Carefully lift the old jack free. Align the new jack precisely with the mounting hole and solder pads. Reapply solder to each terminal, ensuring clean, rounded joints without bridges. Confirm the port sits flush and rotates slightly if designed to do so.
Critical Factors for a Successful Repair
To achieve a reliable and long-lasting laptop DC jack repair, precise attention to thermal management and physical alignment is essential. Applying heat evenly without damaging surrounding components ensures solder flows properly and creates solid electrical connections. At the same time, correctly positioning the jack within its housing prevents strain on the circuit board. Misalignment or excessive soldering temperature can lead to intermittent charging or permanent board damage.
- Use a temperature-controlled soldering iron to avoid overheating
- Align the DC jack flush with the chassis before securing
- Ensure the ground and power pins are symmetrically seated
- Inspect for micro-cracks in the PCB after reassembly
Heat Control and Solder Joint Integrity
Solder flows best when heat is applied steadily and accurately to the joint area. You need to balance the iron’s temperature-too low and the solder won’t adhere, too high and you risk lifting pads or damaging nearby traces. A clean tip and short dwell time help maintain integrity. Watch for a smooth, concave fillet forming around each pin, indicating proper wetting without excess bridging.
Mechanical Support and Port Stabilization
The DC jack must remain securely anchored to prevent stress on solder points during daily use. You should verify the port sits flush and is fully seated before applying any fixative. Some models require adhesive or metal brackets to reinforce the connection. A wobbly or misaligned port will degrade performance over time, even if solder joints appear flawless at first inspection.
Pros and Cons of DIY vs. Professional Repair
Deciding between fixing your laptop’s DC jack yourself or hiring a technician comes down to balancing cost and risk. You save money with a DIY approach, especially if you already own basic tools and have some technical confidence. However, improper handling can lead to irreversible motherboard damage, turning a simple repair into an expensive replacement. Professional repair ensures precision and often includes warranties, but at a higher upfront cost. Consider your skill level and the complexity of your laptop’s design before choosing.
| Aspect | DIY Repair |
| Cost | Low-only pay for parts and tools you don’t already own |
| Time Investment | High-requires research, disassembly, and troubleshooting |
| Skill Required | Moderate to high-soldering and precision work needed |
| Risk of Damage | High-mistakes can harm the motherboard or other components |
| Warranty | None-repairs are self-guaranteed |
| Tools Needed | You must source or purchase specialized tools |
| Turnaround Time | Depends on your availability and part delivery |
| Error Recovery | Difficult-limited support if something goes wrong |
| Professional Repair | Higher cost but includes labor and expertise |
Skill Development and Cost Efficiency
Repairing the DC jack yourself builds practical electronics skills you can use on future projects. You gain firsthand experience with soldering, component identification, and motherboard handling-knowledge that pays off over time. The financial benefit is clear: a $10 part replaces a $150 service bill. If you enjoy hands-on learning and have patience for trial and error, this route offers both immediate savings and long-term competence in device maintenance.
Risks of Permanent Hardware Failure
One wrong move during a DIY DC jack repair can permanently damage your laptop’s motherboard. Excessive heat from soldering can delaminate traces or destroy nearby surface-mount components. Misaligned parts or short circuits may render the power system inoperable. Unlike professionals who use ESD-safe tools and precision equipment, home repairs lack safety margins. If you’re unsure about your technique, the cost of a failed attempt could exceed what a qualified technician would charge upfront.
Maintenance and Prevention Strategies
How you use your laptop’s power adapter daily directly impacts the longevity of the DC jack. Avoid yanking the cord from the port or leaving it under tension when plugged in. Instead, disconnect it by gripping the plug firmly and pulling straight out. Keep the connection point free from dust and debris using a soft brush or compressed air. Consistent, mindful handling reduces mechanical stress and helps prevent premature wear.
Proper Power Adapter Handling Techniques
Always coil the power cable loosely and avoid sharp bends near the plug ends. When unplugging, support the connector with your hand rather than tugging the cord. Let the adapter rest on a flat surface instead of dangling from the laptop port, which adds strain over time. Using a strain-relief sleeve or a braided cover on the cable can also reduce fraying and internal wire breakage near the jack.
Identifying Early Warning Signs of Jack Wear
If your laptop only charges when the plug is held at a certain angle, that’s a clear signal of internal jack damage. Listen for intermittent clicking or crackling sounds when the charger is connected. Visually inspect the port for looseness, wobbling, or visible misalignment. A slightly bent or recessed center pin inside the jack often indicates internal damage that will worsen without intervention.
Conclusion
You now have the knowledge and steps needed to address a faulty laptop DC jack with confidence. By following proper procedures, using the right tools, and prioritizing safety, you can restore power functionality to your device without unnecessary expense. Whether you’re reseating a loose connection or replacing a damaged jack, precision and patience lead to the best outcomes. Your ability to complete this repair strengthens both your technical skill and device longevity.
FAQ
How much does it cost to repair a laptop DC jack myself?
A DIY laptop DC jack repair typically costs between $10 and $30 for parts and tools if you already have basic equipment. The total depends on whether you need to purchase a soldering iron or replacement jack, and prices vary by laptop model and region.
How long does it take to fix a broken charging port on a laptop?
Replacing a laptop DC jack usually takes 1 to 3 hours for someone with intermediate experience. The time depends on the laptop model’s complexity, your familiarity with disassembly, and whether you’re repairing a soldered jack or a modular type.
Can I damage my laptop motherboard when replacing the DC jack?
Yes, improper soldering can permanently damage the motherboard or surrounding components. The risk is highest with surface-mounted jacks where excessive heat or incorrect technique can lift pads or short circuit traces.
What are common mistakes when replacing a DC jack?
Common mistakes include applying too much heat, misaligning the new jack, or damaging nearby components during desoldering. Lack of mechanical support after installation often leads to early failure, even if the solder joints look good.
Is repairing a DC jack worth it compared to buying a new laptop?
Repairing a DC jack is often worth it if the laptop is otherwise functional and less than 3 to 5 years old. The decision depends on repair costs versus the value of the device and availability of comparable replacements.
 Previous Post