



Laptop Hard Disk Replacement Guide
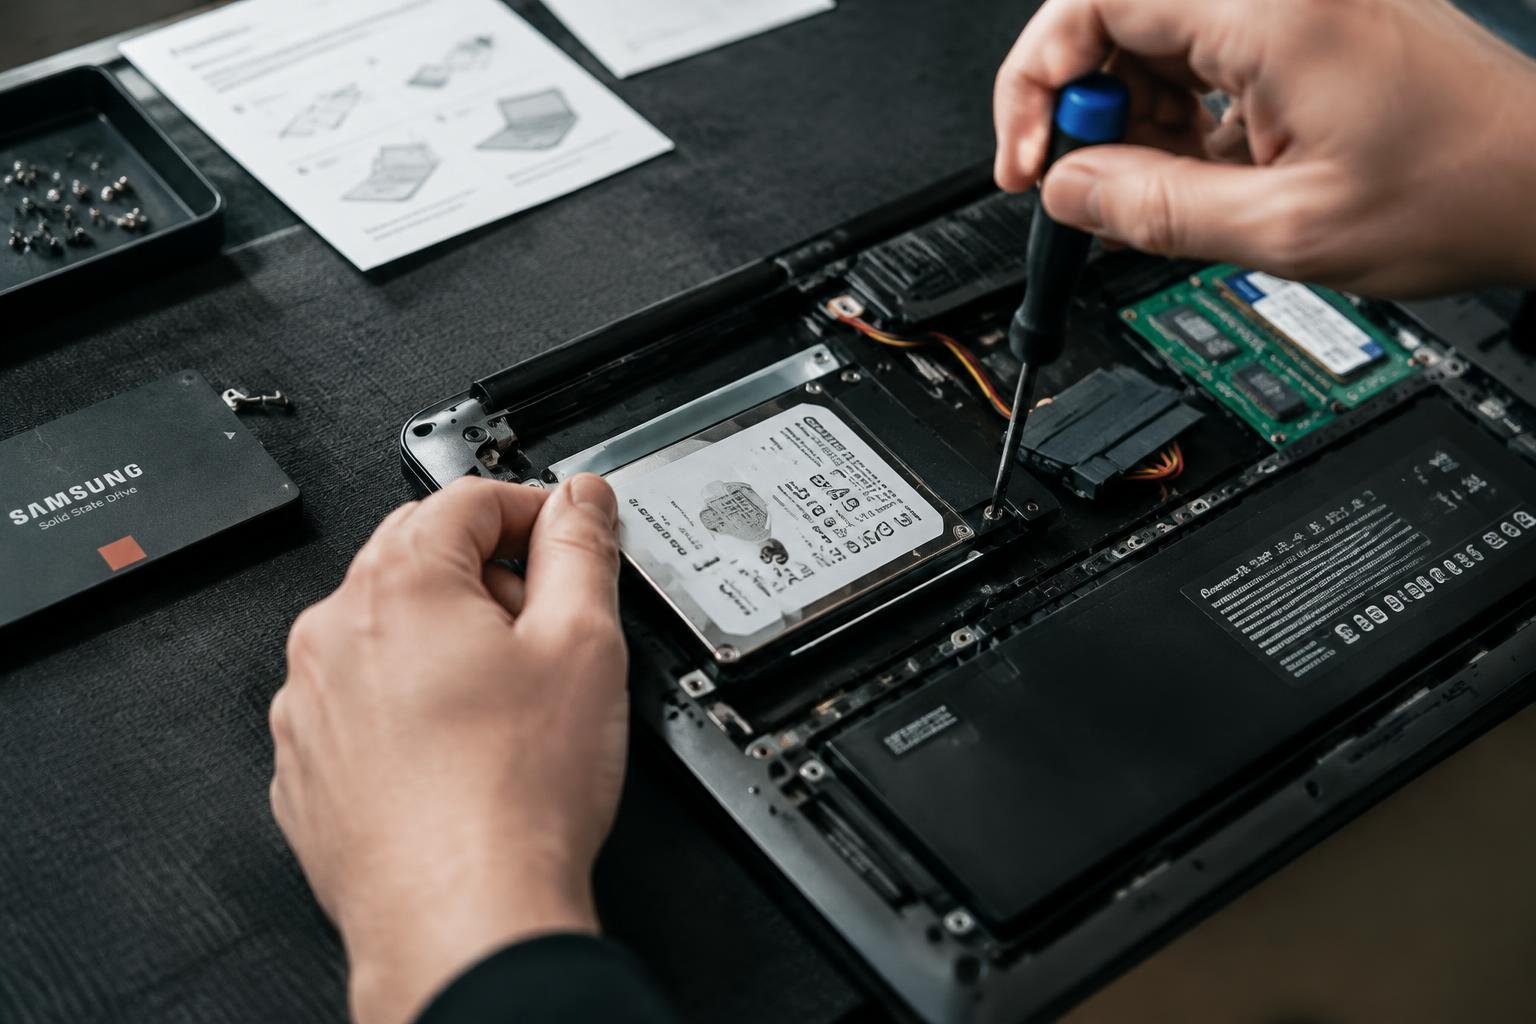
You can replace your laptop’s hard disk to boost speed, expand storage, or revive a failing system. This guide walks you through every step, from choosing the right drive to installing it safely. You’ll gain the confidence and clarity to complete the upgrade yourself, using common tools and straightforward techniques suited for most laptop models.
Key Takeaways:
- A laptop hard disk replacement can extend the device’s lifespan and improve performance, especially when upgrading from an HDD to an SSD.
- Drive compatibility depends on physical size, interface type, and height clearance-common sizes include 2.5-inch and M.2, with SATA and NVMe as key interface standards.
- Back up all personal data before starting the replacement, as the process typically involves wiping the old drive or installing a fresh operating system.
- Basic tools like a small Phillips screwdriver and an anti-static wrist strap help prevent damage during disassembly and component handling.
- Some laptops have proprietary designs or glued components that make drive access difficult, so checking service manuals or teardown videos specific to your model is highly recommended.
Identifying Compatible Drive Types
Selecting the right drive type ensures your laptop performs according to your usage demands. While both SSDs and HDDs serve as storage solutions, their internal architectures differ significantly. Solid State Drives use flash memory with no moving parts, delivering faster boot times and improved durability. Hard Disk Drives rely on spinning platters, offering larger capacities at lower costs but with slower access speeds. Your choice should align with whether speed, resilience, or storage volume matters most in your daily workflow.
- SSDs provide quicker system startup and application loading
- HDDs are better suited for bulk data storage like media libraries
- Most modern laptops support both 2.5-inch and M.2 form factors
- Check your laptop’s manual for supported interface types (SATA, NVMe)
- Ensure firmware and BIOS can recognize the new drive format
Comparing HDD and SSD Technology
Different workloads benefit from distinct storage technologies based on how they read and write data. If you regularly handle large files or need expansive space for backups, an HDD may meet your needs economically. For tasks requiring rapid responsiveness-such as video editing or running virtual machines-an SSD delivers superior throughput and reduced latency. Understanding these performance profiles helps match the drive to your computing habits without overinvesting in unnecessary speed or capacity.
| Feature | Description |
|---|---|
| Speed | SSDs typically offer 3-5x faster read/write than HDDs |
| Lifespan | HDDs may degrade faster due to mechanical wear |
| Noise | SSDs operate silently; HDDs produce audible spinning |
| Shock Resistance | SSDs withstand drops better due to no moving parts |
| Capacity Range | HDDs commonly reach up to 5TB in laptops; SSDs max out lower |
Essential Factors for Hardware Compatibility
Your laptop’s design determines which drives will function properly once installed. Before purchasing a replacement, confirm the physical size supported-commonly 2.5-inch or M.2-and the interface protocol such as SATA III or NVMe PCIe. Older models may not recognize newer NVMe drives even if they fit physically. Power consumption and thermal output also vary between drives, potentially affecting battery life and system stability in compact chassis.
- Verify drive thickness-some ultrabooks require 7mm instead of 9.5mm
- Match the interface: SATA drives won’t achieve full speed on older controllers
- Confirm BIOS supports booting from the selected drive type
- Consider weight savings with lighter SSDs in portable setups
- Check if your model requires a caddy for M.2 or secondary drive installation
Essential Safety Tips and Preparation
Safeguarding your data and protecting internal components from electrostatic discharge should be your top priority before touching any hardware. Always power down your laptop completely and unplug the charger to eliminate electrical risks. Work on a clean, dry surface free of clutter, and avoid carpeted areas that generate static. Keep your hands grounded by frequently touching a metal part of the laptop’s chassis or wearing an anti-static wrist strap connected to grounded equipment.
- Power off the laptop and disconnect the power adapter
- Remove any peripheral devices attached to the system
- Use an anti-static wrist strap or regularly touch grounded metal
- Avoid working in high-humidity or dusty environments
- Handle drives only by their edges to prevent component damage
Tool Requirements and Workspace Setup
Your workspace directly affects the success and safety of the replacement process. Choose a well-lit, flat surface with ample room to organize small tools and screws. Most laptops require a precision Phillips screwdriver, though some models use pentalobe or Torx bits-verify your device’s specific needs beforehand. Keep a magnetic tray or pill organizer nearby to store screws securely. Ensure all tools are non-conductive and clean to avoid accidental shorts or debris inside the chassis.
Creating a Comprehensive System Backup
You never want to assume data recovery will work if something goes wrong during the drive swap. Connect an external drive with sufficient capacity and use built-in tools like Windows Backup or macOS Time Machine to create a full system image. Confirm the backup completed successfully by browsing its contents or verifying its integrity through the software interface. This copy ensures you can restore personal files, applications, and system settings even if the original drive fails unexpectedly.
Step-by-Step Hardware Installation
Proper execution of the hardware swap ensures your laptop functions reliably with the new storage. Follow these detailed actions to replace the drive without damaging internal components. Always work on a clean, static-free surface and handle parts by their edges. Refer to your laptop’s service manual for model-specific access points and screw configurations. Maintain an organized workspace to keep track of small screws and connectors.
| Action | Details |
| Power Down | Shut off the laptop and disconnect the charger. |
| Remove Battery (if applicable) | Slide or unscrew the battery for older models with removable packs. |
| Locate Drive Bay | Find the external access panel or main chassis section covering the drive. |
| Handle Screws Carefully | Use the correct screwdriver and store screws in a labeled container. |
Opening the Chassis and Removing the Old Drive
Begin by turning the laptop over and locating the screws securing the bottom panel near the drive bay. Use a precision screwdriver to remove them, keeping each in a designated spot to avoid loss. Gently lift the panel to expose the internal layout. Find the hard drive caddy or mounting bracket, then disconnect the data cable and unscrew any retention screws. Slide the old drive out with steady pressure, avoiding sudden movements that could damage surrounding components.
Mounting and Connecting the New Storage Device
Take the replacement drive and align it with the caddy or mounting points in the chassis. Insert it carefully, ensuring the connectors line up without force. Reattach any securing screws to hold the drive firmly in place. Connect the SATA or NVMe data cable securely, pressing until it seats fully. Verify the drive sits flush and does not shift when lightly nudged, confirming it’s properly installed before proceeding with reassembly.
Evaluating Pros and Cons of the Upgrade
Swapping your laptop’s hard disk can transform how quickly your system responds to everyday tasks. Modern drives, especially SSDs, deliver faster boot times, reduced file access delays, and improved overall responsiveness. However, not every upgrade path offers the same return on investment. Your specific usage patterns, current hardware limitations, and the type of replacement drive all influence the real-world benefits you’ll experience. Understanding these trade-offs helps set realistic expectations for performance and longevity.
| Pros | Cons |
|---|---|
| Noticeably faster boot and shutdown times | Higher cost per gigabyte compared to traditional HDDs |
| Improved file transfer speeds | Limited write cycles on lower-tier SSDs |
| Quieter operation with no moving parts | Potential compatibility issues with older laptop models |
| Lower power consumption, extending battery life | Greater risk of data loss if firmware fails |
| Enhanced durability due to shock resistance | Requires cloning or fresh OS installation |
Immediate Speed and Reliability Advantages
Your laptop feels more responsive the moment you power it on with a new drive. Files open faster, applications launch almost instantly, and system hiccups during multitasking become rare. SSDs eliminate the mechanical delays inherent in traditional hard drives, giving you consistent performance from the first use. You also gain peace of mind from fewer moving parts, reducing the risk of failure due to drops or vibrations. This reliability translates into smoother daily operation.
Potential Drawbacks and Maintenance Requirements
Some newer drives demand more attention to long-term upkeep. You may need to monitor drive health with built-in tools or manage free space to maintain write performance. Entry-level SSDs can slow down when nearly full, and firmware updates are occasionally required to fix bugs or improve stability. Replacing the drive yourself voids certain warranties, and improper handling during installation risks damaging internal components. These factors require consideration before moving forward.
Final Words
You now have the knowledge to replace your laptop’s hard disk with confidence. Following each step carefully ensures a smooth transition, whether you’re upgrading for more storage or switching to an SSD for faster performance. Handling components with care and verifying compatibility beforehand prevents avoidable issues. The time and effort you invest results in a refreshed system that meets your current needs. A successful replacement extends your laptop’s usefulness without requiring a full upgrade.
FAQ
How much does it cost to replace a laptop hard disk?
Replacing a laptop hard disk typically costs between $50 and $150 for the drive, depending on type and capacity, with SSDs being more expensive than HDDs. Labor costs vary if done by a professional, but self-installation reduces total expense, though tools and time are still required.
How long does it take to swap out a laptop hard drive?
A laptop hard disk replacement usually takes 30 to 60 minutes for someone with basic technical skills and proper tools. The time can increase if the laptop has a complex chassis design or if transferring data from a backup takes longer than expected.
Is replacing a laptop hard disk worth it?
Yes, replacing a laptop hard disk is often worth it, especially when upgrading from an HDD to an SSD for faster boot and load times. The benefit depends on the laptop’s age and overall condition, as older systems may have other limiting components.
What are common mistakes when replacing a hard drive?
Common mistakes include mishandling screws or connectors, which can damage the laptop or prevent the new drive from working. Not creating a full system backup beforehand also risks permanent data loss, especially during OS reinstallation.
Are there alternatives to replacing the internal hard drive?
Yes, using an external SSD via USB port offers improved speed without opening the laptop, suitable for file storage and some software use. However, it won’t provide the same system-wide performance boost as an internal replacement, particularly for booting and multitasking.
 Previous Post